Why Your Metal Guitar Solos Don’t Sound ‘Pro’ (and How to Fix It Fast)
Let’s clear the air on something before we get started.
A great guitar solo, a professional-sounding guitar solo, doesn’t necessarily mean you’re just throwing a bunch of notes at people. In other words, just because you’re playing endless arpeggios up and down the neck doesn’t automatically make that a great solo.
There are two things that truly make a solo stand out:
- It fits into the context of the rhythm that’s being played.
- It triggers an emotional response and captivates the listener, and it should captivate you as well.
In this lesson, we’re going to walk through some simple but powerful techniques that’ll help your solos sound more expressive, emotional, and captivating.
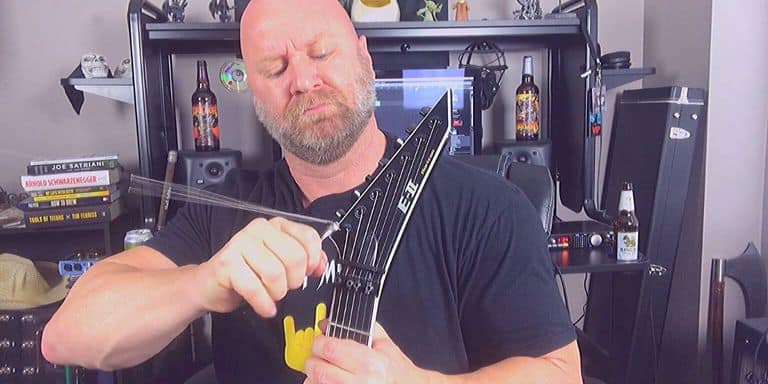
🎸 Watch the full lesson:
In this video, I break down exactly what makes a guitar solo sound pro, from emotional phrasing and bends to rhythmic picking and shred-worthy techniques.
Hit play below to watch the complete lesson, then scroll down for a full written breakdown with extra tips and examples.
Ready to take these lead techniques even further?
Grab my free Metal Riffs & Licks Practice Guide. It includes tabs, tracks, and a full chapter (Chapter 3: Metal Licks) dedicated to lead guitar techniques just like the ones in this video.
👉 Download the free guide here
Step 1: Three Core Techniques for Feel – Bends, Vibrato, and Slides
These are the first three things we’re going to focus on.
They might sound simple, and maybe you’re thinking, “Jason, I already know how to bend a string or add vibrato.”
But here’s the deal: these are the techniques that turn plain notes into music.
They’re what take your solos from sounding robotic and stiff to emotional and alive.
String Bending
When you bend a string, you’re bending to a target note. Most of the time, a half step or a whole step above the one you’re fretting.
For example, instead of playing two separate notes like this…
You can bend up to the second note.
That single move adds character, feel, and emotion. It’s one of the simplest ways to bring your playing to life.
Vibrato
Vibrato is basically a controlled bend.
You’re not bending all the way to a new note. You’re just giving that note some flavor.
The best way I can describe it is like putting hot sauce on chicken wings… or chili peppers in curry. You’re adding spice. Not too much, just enough.
Every guitar player does vibrato a little differently. Don’t let anyone tell you there’s only one right way to do it. If it sounds good to you, that’s what matters. That’s how you start developing your own unique style, and that’s what this is all about.
Slides
Slides connect your notes and make your phrasing sound smooth and expressive.
Try this: play a note, then a lower one, and slide back up to the first.
You’ll instantly hear the difference. It’s more fluid, more melodic, and more human.
Bottom line:
When you combine bends, vibrato, and slides, your solos stop sounding like a string of notes and start sounding like your voice.
That’s when people start to feel what you’re playing.
Try This Expressive Lick:
Here’s a short melodic lick in E minor that combines bends, vibrato, and slides, the three essential techniques that make your solos sing.
Don’t rush through this one. Feel every note and focus on expression over speed.

How to Practice It:
- Start by sliding from the 13th to the 15th fret.
- Pick the 17th fret and bend it a half-step. You can let that ring out and soar, and even bending back and forth, giving it some vibrato (don’t rush this).
- After that emotional string bend, pick the 15th fret and slide back to the 13th fret.
- End with some soulful vibrato.
NOTE: You may not think of this style when it comes to metal guitar solos. But it’s the very thing that will keep your solos from sounding stale and make them more pro-sounding when you start adding the techniques for speed that we’re about to cover. So get ready.
Step 2: Add Groove with Rhythmic Picking

Now let’s talk about something I call Rhythmic Picking.
You probably heard this in the intro of my video. It’s a way to make your solos feel more like rhythm playing and to give them a sense of pulse and groove.
Here’s what I mean:
Let’s say you’re playing on the G and B strings. You could hold a constant note on the G string, lightly palm-muted, and then move through frets 5, 6, and 8 on the B string, going back and forth between those two strings.
That’s the core concept.
You can slide the whole pattern up the neck, mix up the timing, change your picking attack, and you’ll start to feel how this blends rhythm and lead together.
It’s an awesome way to make your solos sound more interesting and dynamic, and it gets you out of that single-note rut that a lot of players fall into.
And yeah, we’ll go ahead and say that Jason Stallworth coined that phrase, rhythmic picking.
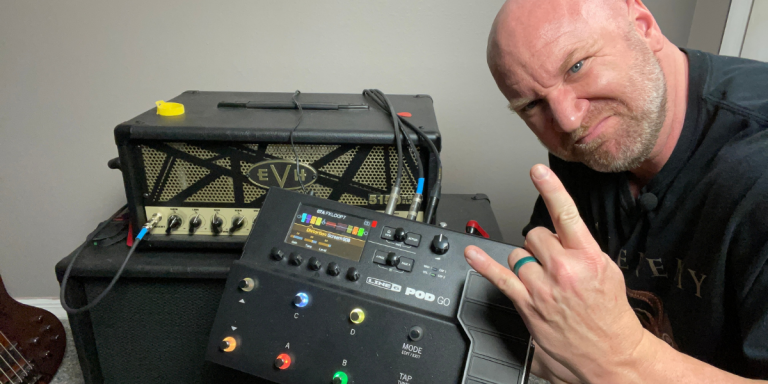
Oh, and if you’re searching for the perfect lead tone, then check out my post Metal Lead Guitar Tone Made Easy. Having a great tone will inspire your playing like nothing else (whereas a crappy tone will do the opposite!).
Try This Short Rhythmic Picking Tab:
This example blends rhythm and lead playing by alternating between two strings, a concept I call rhythmic picking.
It adds a groove and percussive feel to your solos, breaking you away from single-note lines.

How to Practice It:
- Keep a steady down-up picking motion and light palm muting on the G string notes.
- Think of the G string as your “anchor” and the B string as your melody note.
- Notice how this is done in two places on the fretboard in the tabs.
- Experiment with adding other notes in between with slides or bends.
Step 3: Smooth Things Out with Legato
Now let’s get into some of the faster, smoother techniques. The ones that make your solos feel fluid.
Legato is one of my favorites because it gives your lines a whole new character without making you work harder.
Here’s how it works:
You pick the first note, then use hammer-ons and pull-offs for the rest.
For example, on the B string, try 7–8–10.
Pick the first note, hammer the others, and then pull back down.
You’ll notice you can play faster, but you’re also using less effort.
The result is smoother phrasing and a totally different sound compared to strict alternate picking.
And it’s not about which one is “better.”
You want both skills in your pocket. Sometimes you want the attack and definition of picking, other times you want the smooth flow of legato.
Having both gives you more control over your tone, phrasing, and expression.
Try This Short Legato Tab:
This is a simple three-note pattern starting on the B string that uses both hammer-ons and pull-offs.
Focus on smooth transitions between each note. Your fretting hand should do most of the work.

How to Practice It:
- Pick only the first note, then let your fretting hand handle the rest (until the final note).
- Keep each note even and clear, allowing your fingers to hammer-on and pull-off throughout the lick.
- Notice that final note where you slide to the 9th fret; this note is picked (you can slide from the 7th fret).
Step 4: Get Precise with Alternate Picking
Alright, let’s talk about speed and precision. Because I know you want to shred, and there’s nothing wrong with that.
The key is control.
Here are two things that’ll make your alternate picking sound tighter right away:
- Light palm muting. It cleans up the sound and keeps your notes from bleeding together.
- Think in threes. Seriously, groups of three notes at a time (1-2-3, 1-2-3, 1-2-3). This helps your hand lock into rhythm and makes your picking smoother.
And once you’ve got it, start repeating those short patterns. That’s an easy way to build speed fast.
You can always mix this with bends and vibrato, so it’s not just an onslaught of notes. Fast is cool, but feeling is everything.
Try This Short Alternate Picking Tab:
Here’s a simple three-note-per-string pattern in E minor to help you build speed and control.
Focus on consistent picking and clean transitions, not raw speed.
How to Practice It:
- Use strict alternate picking (down-up-down-up, etc.).
- Group the notes mentally as 1-2-3, 1-2-3, 1-2-3 to lock in your rhythm.
- Start slow, palm-muting slightly if needed for tightness.
- Take note of the bend and vibrato towards the end; this adds character to the lick so that it doesn’t sound mechanical.
Next Step:
Suppose you’ve already gone through my free Metal Riffs & Licks Practice Guide.
In that case, the next step is joining the Jason Stallworth Guitar Academy.
This is where you’ll learn structured courses like Lead Guitar Apprentice and Melodic Soloist that build these exact skills.
Step 5: Add Color with Sweep Picking and Tapping

Sweep picking can be intimidating, but it doesn’t have to be.
Start with smaller shapes like three-string arpeggios on the G, B, and E strings. You can do something like 12–13–12 and then tap the 15th fret.
One cool variation I love is sliding that tap note up a fret while holding it down. It adds this almost vocal lift to the phrase.
That’s what makes it sound different.
And again, the goal isn’t to turn your solo into an arpeggio exercise. It’s to add color and dynamics when it fits.
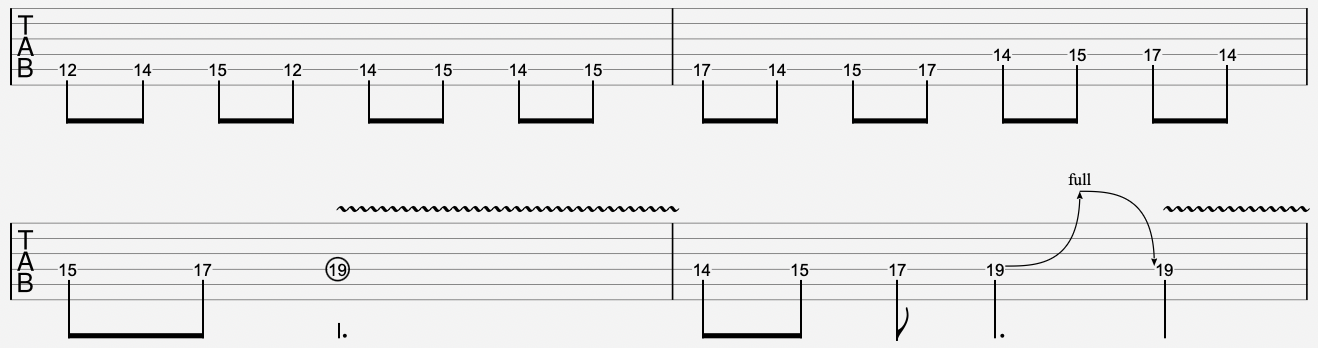
Try This Short Sweep Picking Tab Exercise:
Here’s a simple three-string sweep arpeggio with a tap and slide at the end. Just like I demo in the video, when I talk about adding life to your arpeggios so they don’t sound so mechanical and typical.

How to Play It:
- Sweep down through the G–B–E strings, hammer on to the 15th fret.
- Finger tap 19 and slide to 20, then slide back to 19 before pulling off back to 15 and 12.
- Follow through, sweeping up the same way you came down.
- End by sliding from 12 to 15.
Step 6: Play in Context by Learning the “Safe Zones”
Let’s circle back to something I said early on: your solos have to fit the rhythm.
That means understanding the key of the song and knowing where your “safe zones” are on the fretboard.
Let’s use E minor as an example.
Start on E, end on E. The half steps in the minor scale happen between the 2nd and 3rd notes, and the 5th and 6th notes.
If you remember that structure, you can move it anywhere on the fretboard.
That’s how you unlock the entire neck by recognizing patterns, not memorizing 12 different scales.
Once you know where you can go safely, then you can step outside of the scale intentionally.
That’s when you start sounding creative, not random.
So learn those safe pockets in different keys, practice soloing within them, and you’ll start to hear how your solos fit better with the rhythm.
Oh, and when you’re ready to start recording your solos and hearing your progress, I’ve got a full guide that walks you through every step of the setup process.
Check out my Home Recording Studio Guide for Metal Guitarists post. It shows you exactly how to build a simple, great-sounding recording setup that’s perfect for tracking solos and riffs at home.
Try This Short E Minor Scale Tab:
Here’s an example of how your E minor scale connects across two positions.
Start slow and feel the flow of the notes, and listen to how one shape naturally leads into the next.

How to Practice It:
- Start by learning each position slowly and clearly.
- Notice how you can continue that scale starting from where you ended (G string, 9th fret in this case).
- Continue to connect the structure in E Minor throughout the fretboard.
- You quickly learn and memorize where these ‘safe zones’ are in this key and will be able to easily create solos on the fly, in this key.
- Continue this strategy with other keys you want to play solos in.
Step 7: Pull It All Together
Here’s your roadmap to tie everything together:
- Choose one backing track (E minor is a great starting point).
- Write a short melody using bends, vibrato, and slides.
- Add a little rhythmic picking to give it groove.
- Use legato for smooth runs, and alternate picking for precision.
- Throw in a short sweep or tap for flavor.
- Record yourself and listen back. Does it sound like a solo or just an exercise?
Repeat that process often, and you’ll be amazed at how quickly your phrasing improves.
Next Steps
If this lesson connected with you, here’s what I recommend:
- Grab my free Metal Riffs & Licks guide.
Chapter 3 dives into lead guitar techniques and shows you how to apply them in real solos. - Then check out the Jason Stallworth Guitar Academy.
Start with Lead Guitar Apprentice if you’re newer to soloing. That course will take you from the fundamentals to creating your own expressive leads.
When you’re ready, move into Melodic Soloist. That’s where you’ll start shaping your signature style.
Keep it Metal,
Jason