POD Go Lead Guitar Tones and Settings for Live Performances (Clean and Rock Tones)
Whether you’re playing live solo gigs or playing with a full band, you want a lead guitar tone that cuts through the mix but that doesn’t sound overbearing or annoying.
And if you’re playing cover songs, you need a lead sound that’s going to be diverse enough to fit the multiple styles and genres that you’re playing. Of course, you can create several different patches but I’m going to show you how to keep things simple on stage.
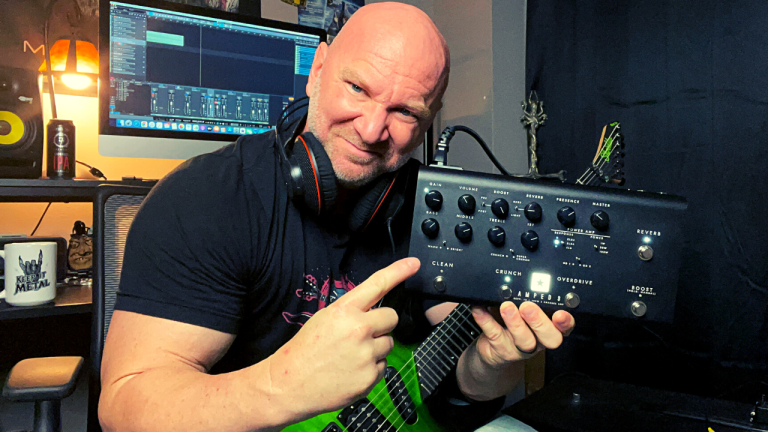
In this post, I’m going to share two lead guitar tones that I created using the Line 6 POD Go. And both will cover almost any genre that you’re playing on stage.
It’s also important to note that these are the tones and settings for my live solo gigs. I’ll talk more about that, as well.
Here’s what you’ll learn:
- POD Go rock lead guitar tone and settings
- POD Go clean lead guitar tone and settings
- POD Go Rhythm settings for solo live gigs
- How I use the POD Go to play leads for live solo gigs
- Why I chose the POD Go (instead of the more expensive effects units)
POD Go Rock Lead Guitar Tone and Settings
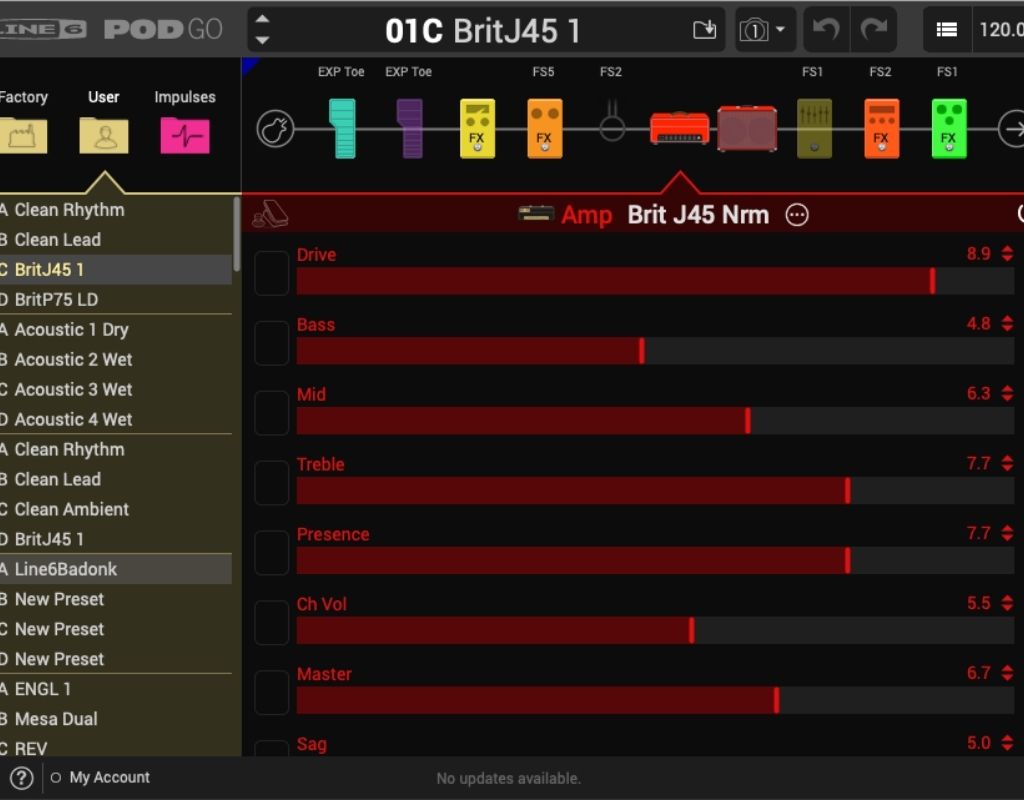
For my rock lead guitar tones, I’m using the Line 6 POD Go Brit J45 amp. This is modeled after the Marshall JTM45, which is Marshall’s first amplifier to be released. There’s some cool history behind this amp that you can read about on the Marshall website: The History of Marshall Amplifiers
Like the real JTM45, the Line 6 Brit J45 is a mix between blues and rock. It can give you that smooth, creamy lead tone. But you can also get a nice rock, or even hard rock lead guitar tone from it. It can fit a wide range of genres and styles. And that’s the reason why I built this lead tone with the Brit J45.
My amp settings aren’t anything crazy but I do have the drive on the amp cranked up. You have to remember this is not a high-gain amp. And even though I’m not playing hard rock or heavy metal at my solo gigs, I do want enough saturation in my leads to provide sustain and a full sound.
I use the default cabinet, which is the 4×12 Greenback cabinet sim. And I use their version of the Royer 121 mic. In my opinion, that’s the best-sounding mic within the POD Go mics that are available. It sounds great with any of their amp sims.
On that note, you’ll notice that I place two pedals in front of the amp. One is the Line 6 Blue Compressor followed by their version of the Fulltone OCD overdrive pedal. These additions really make your lead tone shine.
Lastly, I have reverb and delay pedals going through the effects loop of this amp sim. This is a go-to setup for all of my lead patches.
POD Go Rock Lead Guitar Signal Chain
In front of the amp:
- Blue Compressor
- Compulsive Drive
Effects loop
- Reverb Plate
- Simple Delay
POD Go Rock Lead Settings Screenshots


POD Rock Lead Tone YouTube Video
POD Go Clean Lead Guitar Tone and Settings
For my clean lead guitar tones, I’m using the Line 6 POD Go US Double Vib amp. This is modeled after the Fender Dual Reverb, another classic and versatile amplifier.
And I’m using the 2×12 cabinet that comes with this amp sim by default. The mic I’m using is also the 121 ribbon mic, the same as my rock lead tone.
A quick note: I use my clean lead guitar tone for my live solo gigs a lot more than the rock lead tone that I shared above. Clean tones sound smoother and more fitting for these types of gigs, which I’ll get into more towards the end of this post.
That said, I really wanted to make sure that I created an awesome clean sound.
These clean amps are by default lower in volume. One of the things that help give this a boost without distorting your sound is the 3-band compressor that I use in front of the amp. In fact, that’s the only effect that I use in front of the amp for my clean leads (and clean rhythm, for that matter – I’ll get into that below as well!).
I use reverb and delay pedals in the effects loop. And I also have the trinity chorus pedal but I rarely use that. I love how the chorus sounds in the mix but for playing live solo shows, I prefer the amp without any chorus. But I kept it in the chain in case I decide to use it here and there!
POD Go Clean Lead Guitar Signal Chain
In front of the amp:
- 3-Band Compressor
Effects loop
- Trinity Chorus
- Reverb Plate
- Simple Delay
POD Go Clean Lead Settings Screenshots


POD Clean Lead Tone YouTube Video
My POD Go Rhythm Guitar Settings for Live Solo Gigs
You may be wondering why I didn’t list my rhythm guitar settings. Remember what I said about keeping things simple on stage?
My core rhythm guitar tone that I use for my solo gigs is the exact same as my clean lead tone. The only difference is that my rhythm patch on the POD Go has less delay and the volume is slightly lower than my lead patch.
It’s close to the sounds you hear from bands like The Outfield, The Police, and Bryan Adams. It fits pretty much every style and genre of music that I play on stage when I’m playing covers at my solo shows.
So this is the rhythm tone that I’ll use to sing with and loop while playing solos (using both my clean lead and rock lead tones).
How I Use the POD Go for My Live Solo Shows
I’ve mentioned a few times in this post about playing live solo gigs. So you may be wondering how I pull off playing guitars solos at these shows.
No, I’m not just playing a crazy solo by itself, although I may break out something like that between songs. But I primarily use a looper pedal to loop a rhythm and play leads over that.
Here’s my process:
- Start by playing a rhythm
- Click the looper to record the part of the rhythm that I want to solo over
- Once the rhythm is recorded, I’ll click over to one of my lead patches on my POD Go and solo
Oftentimes I’ll do this in the middle or at the end of a vocal song. Or I may just play an instrumental and solo over a rhythm that I loop. And I do all of my looping live, on stage (I don’t pre-record anything).
Now, the Line 6 POD Go does include a looper. But there are several foot-switch clicks that you have to make to record that loop and then change patches if you want a different sound for your lead. For that reason, I use an external looper pedal, and one with a dedicated stop switch.
I also do the same when playing acoustic. I’ll be putting out more content on looping soon!
Why I Got the POD Go Instead of the Helix
I’ve had several ask me why I got the POD Go instead of something like the Line 6 Helix, Kemper, or Axe FX. There are two core reasons for this.
- My goal was to simplify my stage setup while keeping everything cost-effective.
- I use the POD Go for my live solo gigs, in which I’m playing mostly 80s and some 70s cover songs. And I’m mostly playing acoustic but also integrating some electric. So I just needed a couple of great tones that are diverse enough to sound good for the different styles of songs.
All that said, the POD Go does everything I need it to. I couldn’t justify buying a processor that costs 3x or more than the POD Go.
It’s also small and compact so it doesn’t take up a lot of room on stage. There are a few stages that I play on that don’t have a lot of extra space. And when you’re setting up, playing, and tearing down your gear for live solo gigs, less is more.
I hope this helps you. And even if you don’t have the POD Go or have no intention of getting one, you can still use my settings with your processor, amp sim, or real amp and see what you come up with.
Keep it Metal, and sometimes rock!
Jason