Heavy Metal Rhythm Tone: EVH Amp and Passive Pickups
To date, this is the absolute best heavy metal guitar tone that I’ve ever dialed in.
In this post, I’m giving you the details of my settings with images of what I consider an amazing metal tone. Here’s what you’ll learn below (I’ll also be sharing some additional tips throughout this post):
- Amp and guitar I used
- In-depth amp and EQ settings
- Mic placement
- Why I didn’t use any effects pedals
- Process of recording for these heavy metal rhythm tracks
- Video where you can hear these tones
- The album this was recorded for (Overcometh)
Gear for a Classic Heavy Metal Meets Modern Metal Tone

Alright, to clarify here when I say classic heavy metal I’m referring more to the style of metal. Bands like Iron Maiden, Metallica, Testament, and Judas Priest (specifically their Painkiller album) all come to mind.
When I say modern metal, I’m referring more to the ‘cleaner’ high gain and saturation. To me, that’s the perfect storm. And all that said, this heavy metal tone I’m going to show you is versatile enough to fit a wide array of metal sub-genres. Heck, this could even be used for hard rock.
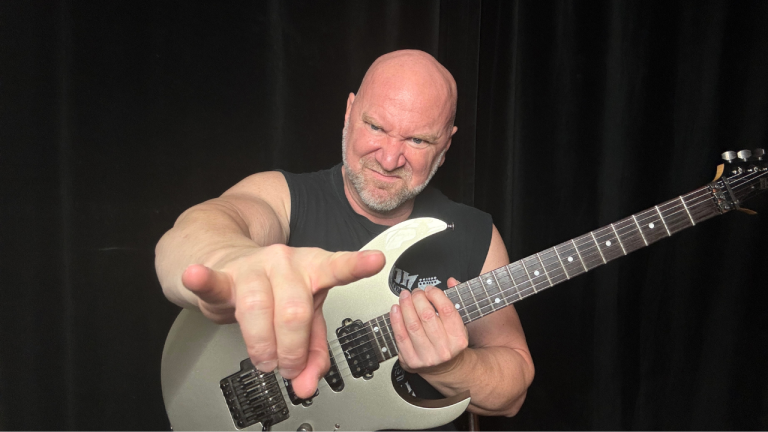
Amp and Guitar Used
- EVH 5150 III EL34 50 watt head
- EVH 2×12 cabinet (matching)
- Ibanez Prestige RG1570
- Shure SM57 microphone
I’ll cover more gear used later in the post.
To get this combination, I decided to go with a modern tube amp, the EVH 5150 III EL34 50 watt head with the matching EVH 2×12 cabinet. And I’m using the red channel (I call this the ‘fire-breathing’ channel).
The classic side of this whole thing revolves around the old-school and trusted Shure SM57 mic and using a guitar with passive pickups. It’s kind of funny because I use to be dead-set on playing with active pickups (my LTD M-1000 Deluxe with EMG 81 pickups has seen a lot of action over the years). But lately, my Ibanez RG1570 with the stock V7/S1/V8 passive pickups has been a lot closer to my side than my other guitars.
***I have a full write-up on this guitar here: Ibanez Prestige RG1570 – Why I’ll Never Sell this Guitar
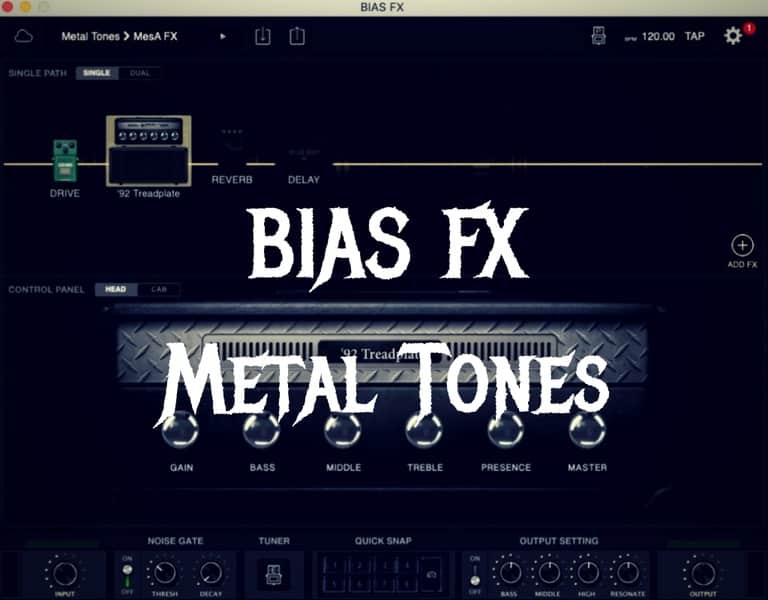
Heavy Metal Rhythm Tone EVH Amp and EQ Settings

Now it’s time for the secret sauce. Actually, there are no secrets here.
In fact, there’s really nothing special at all about my amp and EQ settings for this metal rhythm tone. The only surprise may be the volume and I’ll talk about that below.
EVH Heavy Metal Amp and EQ Settings (Overcometh Album)
- EVH channel: RED
- Gain: 7
- Low: 5.2
- Mid: 4
- High: 6.1
- Volume: 2
- Presence: 6.2
These are fairly accurate to the image above.
Let’s address the elephant in the room, first. By the way, ‘elephant’ is pronounced ‘cĥāng’ in Thai: ช้าง
If you know me, you know my relationship with Thai culture!
You may be asking: ‘Okay, Jason, what’s the with the volume? You have to have the volume cranked on a tube amp to get a good tone, right? Don’t the tubes have to ‘heat up’ to produce a decent metal tone?’
In most cases, you’d certainly want to crank your amp when recording metal tracks. But I’ve found that I can dial in an awesome heavy metal tone at lower volumes with the EVH 5150 III 50-watt head.
Now, I have the EL34 version but I’m sure the same goes for the 6L6.
And even though the volume is only at 2, it’s still pretty loud in my 10×11 room. You may also be surprised that the input level on my audio interface where the mic is plugged in is only at a level of 38, which isn’t super high at all.
Side Note: One thing that I encourage you to do is experiment with different volumes, settings, and so forth. Find out what works for you. You shouldn’t take what all of the ‘gurus’ say on the internet as gospel. Many of those folks are just yapping and don’t have anything substantial to validate their opinion, anyway. It’s only an opinion based on someone else’s opinion that they heard.
Let’s now discuss the other settings; the EQ and the gain. Again, my EQ is nothing special or outrageous. I’ve never been a fan of extreme EQ settings (or any extremes, for that matter!). You’ll only see some minor cuts and boosts here and there.
The gain is only around 7. Even at a lower volume, this is plenty enough saturation. And the tone is tight.
More Gain and EQ Tips
Here are some things to consider when dialing in your gain and EQ settings:
- Gain: Too much gain will often lead to a muddy sound. Your gain in the full mix will more than likely be different (backed off) when you’re recording tracks for a song with other instruments versus your settings when you’re jamming or practicing.
- Bass: I normally back the bass off a little but in this case, it sounded better with a slight boost (5.2, if you can even call that a real boost!). You want to leave room for the bass guitar to carry those low-end frequencies. If you put too much bottom end on your guitar amp, you run the risk of those frequencies clashing with the bass, leaving you with a muddy mix.
- Mid: Mid settings are the ultimate personal preference. I wasn’t going for the ‘…And Justice for All’ mid-cut here but I did want them cut slightly. For the next album, I may experiment with boosting my mids a little (although I do that for my lead guitar tracks).
- Highs: Highs (treble) and presence seem to work hand-in-hand as they can both shape your high-end frequencies. Too much of either (or both) can give you more of a fizzy sound, which is usually not wanted. If those frequencies are cut, then you’re more apt to have that boomy sound. So it’s all about finding that balance that works for you. Also, you may find that you may like the presence boosted on some amps while it may sound better cut with other amps.
Lastly, for this amp and EQ section, my lead tone doesn’t change much. Typically, I’ll boost the mids and may also boost the gain from 7 to about 8. That’s enough to help the guitar solos cut through the mix. I’ll also move the mic a little closer to the cone (we’ll get into mic placement below).
Mic and Mic Placement


I don’t think you can ever go wrong using the Shure SM57 mic. Especially for miking high gain amps. It just works.
This also gives you that classic heavy metal vibe in regards to how it picks up the sound coming out of the amp. However, I always encourage you to use different recording strategies and I’m sure I will experiment more on the next album.
Let’s talk about my mic placement. And as you can see in the images above, there are two core components to mic placement:
- Proximity from the grill: About 1 inch away
- Proximity from the speaker cone: just outside of the right side of the cone
Like everything in this post, this isn’t necessarily ‘how you’re supposed to mic an amp.’ I’m only sharing how I did it for this specific album. With that, I’m going to cover some tips below.
Mic Placement Considerations
- Amp Grill Placement: The closer to the grill, the more volume you’re going to get and potentially a tighter guitar sound. The further away, the more room noise you’ll pick up and you’ll hear that distance in your recorded sound.
- Speaker Cone Placement: The closer to the cone, the brighter the sound you’ll get. The further away from the cone, the darker the sound will be.
There’s typically a sweet spot that you’ll find. And that doesn’t have to always be the same placement for every song or album. You may also experiment with those extreme placements for some songs or parts of songs. At the end of the day, it’s all about matching the guitar tone with the vibe you want for that song or album.
One final note on mic placement: I always record two rhythm guitar tracks and hard-pan each track (left/right), which I’ll get into more later. But I normally will use a slightly different mic placement when recording that 2nd guitar track (either closer to or further from the cone). This gives you that subtle difference between the two tracks making for a really awesome sound in the mix. I didn’t do that this time but will make that slight adjustment using the post-EQ in the studio.
Why I Didn’t Use Effects Pedal of Stomp Boxes

The only pedal I used for recording the heavy metal rhythms for the Overcometh album was a noise gate: MXR Smartgate.
As I mentioned earlier, the EVH 5150 III red channel doesn’t need an overdrive like many high gain amps do to clean it up. I tried an overdrive but got rid of it because the gain from that channel sounds much better and tighter without one.
In a live situation, you’d probably see a reverb and delay pedal here. And maybe a chorus pedal. But I didn’t use any effects for recording these rhythm tracks.
The thing about using hardware effects is that once you record that track, you’re stuck with it. For example, what if you record your rhythm tracks but don’t like the reverb in the mix? You’re stuck! You either have to live with it or re-record those tracks again, which is timely and could cost more money (studio time, whether it’s the actual recording process or the studio engineer’s time going back and forth). For effects, I’ll just use plugins on those tracks for this album.
I rarely use any effects for rhythm tracks as I want to keep those as tight as possible. For leads, I’ll throw in some delay and maybe a little reverb. And I have some clean and ambient parts throughout the album that will require some delay, ambient reverb, and chorus.
My Process for Recording Heavy Metal Rhythm Guitars

I covered a bit of my recording process already throughout this post, but I’ll give you the rundown here:
- Ran the Shure SM57 mic through my PreSonus Quantum 2 interface using PreSonus Studio One Pro DAW
- Recorded two rhythm guitar tracks
- Hard-panned each rhythm track (left/right)
- I will add post-effects and compressor later during the mixing process
Metal Rhythm Guitar Recording Tips: Some may ask why I don’t just duplicate the first track instead of recording a new track. Duplicating the track only increases the volume, nothing else. I want to hear those subtle differences and nuances between the two rhythms. That makes the recording more lively and gets you away from that overly processed and perfected sound that’s just dead.
I hard-pan the two rhythms for the same reason. It gives you a lively and full sound. You can read more about my recording process in this post: Complete Guide to Recording Guitars with a Real Amp
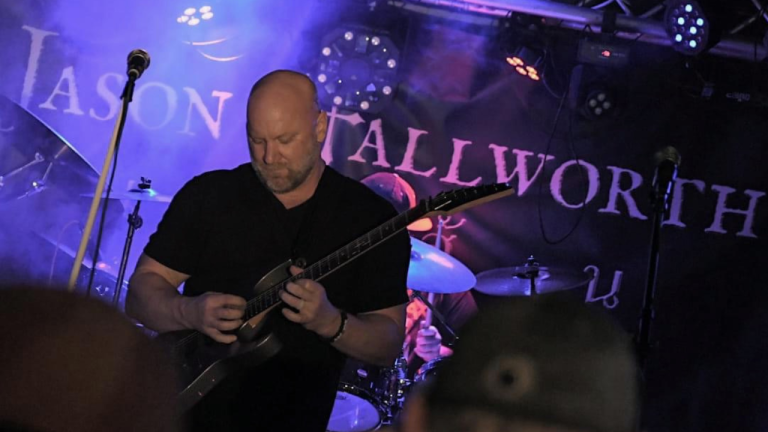
Video with Metal Rhythm Tones and More
Here’s the video of this blog post. You can also hear the tone throughout the video (and at the end).
***Please open the video in your YouTube app or watch it on YouTube so that you can like the video and comment!
Recording the Overcometh Album
Ideally, you’d want to record your album, or at least all of the rhythm tracks, within a few days. This makes the process easier in the sense that you stay in that groove. And it also reduces the risk of messing with your amp settings during the recording process. Unless your songs are completely different, you want the sound of the rhythms to be consistent throughout the album.
I didn’t exactly follow my own advice this time. For whatever reason, it took me several weeks to record all of my rhythm tracks. Fortunately, I didn’t use my amp for anything else during the process so none of the settings were ever changed. But there was a time or two when I bumped the amp and the mic placement while filming YouTube videos. Again, I’m in a small 10×11 room and do all of my recording and video work here.
I really need a larger space, soon!
My schedule is kind of all over the place, too. So I need to make sure that next time I start working on an album I make a tight schedule and stick to it. Learn from my mistakes!
There’s some more history behind this album, which was a year and a half in the making. I explain that at the end of the YouTube video above. And I’ll be posting more content on that, soon!
Keep it Metal,
Jason