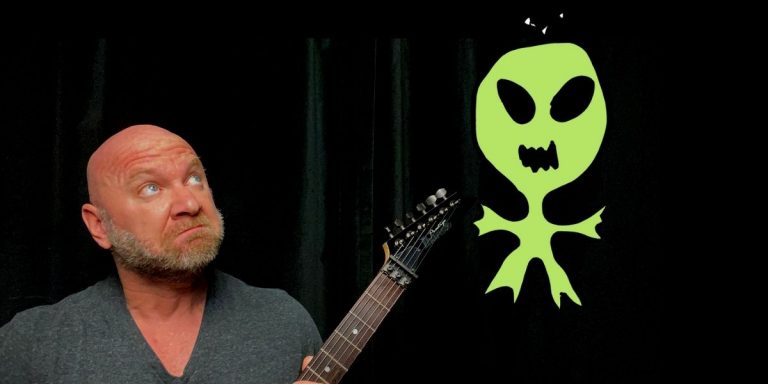
Complete Guide to Recording Metal Guitars with an Amp
In the modern era of recording music, many musicians are using virtual amp sims or hardware amp simulators like Axe Fx, Kemper, and the Line 6 Helix.
But what about going old school and recording your guitars with a real tube amp?
No matter how great these amp sims get there’s still always something missing that you can only get with a real guitar amp. There’s also an art to recording guitars with an amp.
Not to mention it’s so much more fun to record with a real amp than with amp sims!
So if you don’t want your song or album to sound like everything else out there, keep reading this post! I’m going to share all of the details you need on how to record your guitar with an amp and get an awesome tone that will fit perfectly in the mix.
For the most part, you can record your amp in your home studio. I’m going to share everything you need to do this, even the details of the equipment that I use (and the amp I use is perfect for recording in home studios).
Everything (Gear) You Need to Record Your Guitar

First, let’s cover the gear you need to have or bring to your studio. This is going to be everything from hardware to software, and from your music equipment to the cables you need.
Here what you need to record metal guitars (or any type of music, for that matter, except for country…okay, okay, I’m totally kidding – this works for country, too!):
Studio Hardware and Software Needed:
| Recording Gear | What Jason Uses |
|---|---|
| Computer | iMac |
| Audio interface | PreSonus Quantum 2 |
| DAW (your recording software) | PreSonus Studio One Pro |
| Studio monitors | KRK Rokit 5 |
| Closed-back headphones | KRK KNS-6400 (I would go with the 8400 as these lack bottom end) and AKG K301 (these are old but still awesome) |
At the time of this post, I’m using PreSonus Studio One Pro for my DAW with the PreSonus Quantum 2 audio interface. I use the Thunderbolt cable to connect the interface to my iMac. Prior to that, I was using the PreSonus AudioBox USB interface.
For more details on recording hardware and software, I also have a complete home recording studio setup guide here: Jason’s Home Recording Studio Guide
Music Equipment Needed for Recording
| Music Gear | What Jason Uses |
|---|---|
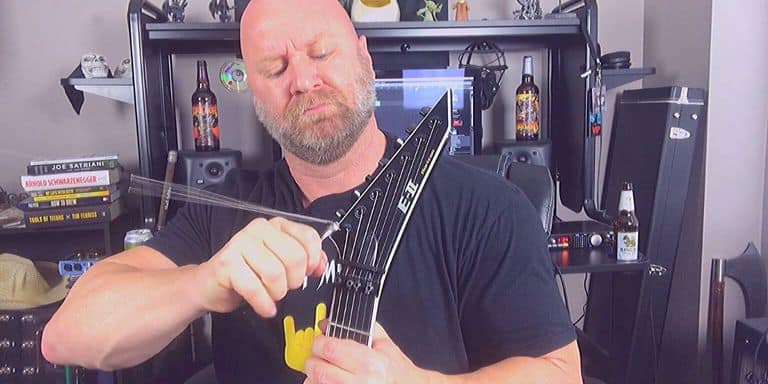
| Guitar | Mainly my LTD M-1000 Deluxe, Ibanez Prestige RG1570, and ESP E-II Horizon FR-7 |
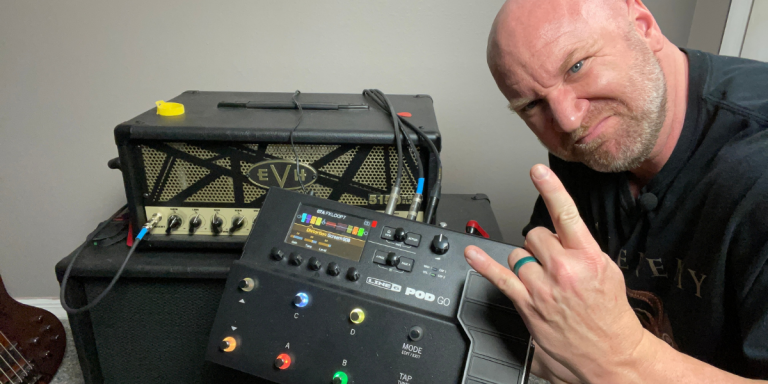
| Amp | EVH 5150 III (EL34) 50 watt head with matching 2×12 cabinet |
| Noise gate | MXR Smart Gate |
| Mic | Shure SM57 |
| Instrument cables | Pro Co |
| Mic (XLR) cable | Pro Co |
| Mic stand for amp | not sure of the brand but it’s a mini-mic stand |
I realize most of this is common sense. But you know that we musicians love our gear and always like to know what others are using!
There are some components that you may feel are missing from the list. One of them being an overdrive pedal, which is a common addition to metal amps. However, the EVH 5150 III amp does not need one.
There are other pedals and effects you can use as well, but I’ll talk more about those and why you may not want to use them when we get to the ‘recording your guitar’ section below.
If you’d like to see all of the gear I use for both studio recording and playing live, check out my gear page here: Jason’s Gear Page.
Type of Guitars and Pickups Needed for Recording Metal

Here’s where things can get a bit controversial and confusing. Because you’ve probably heard that you need a specific type or brand of guitar with active pickups to record metal music.
That’s just not true.
Though there are guitars that are made for metal music you have to realize that much of your tone comes from your hands. It comes from the way you play, your approach, and the emphasis you put behind those notes that are played.
There are three things I strongly encourage you to do:
- Go to your local music store and play as many types and brands of guitars you possibly can, but do blind tests. Try your best not to be subconsciously biased by the brand or type of guitar. Simply assess how it feels, plays, and sounds to you. You may be surprised.
If you’re in Tampa, FL, the best place to go is Replay Guitar Exchange, and tell them Jason Stallworth sent you! - Don’t always go for the most expensive guitar This goes back to what I just mentioned about not being biased. There are guitars that play and sound just as good, if not, better (to me) than other guitars that are double their price.
For example, my LTD M-1000 Deluxe (around $1,000 new) plays just as good as my ESP E-II Horizon FR-7 (about $1,900 new). I could have saved myself almost a grand (I actually bought the LTD used for $600). - Lastly, if you’re a musician on a budget, just use whatever guitar you currently have. Maybe you just change out the pickups. Or maybe the ones you have are fine. Don’t let financial limitations keep you from playing, writing, and recording music.
Here’s a video I filmed at Replay Guitar Exchange where we found five metal guitars under $500:
Active VS Passive Pickups for Metal
Things like guitar brands and types of pickups can indeed make a difference. But probably not as much as you think.
Much of that can be mental. I say this from experience…
There was a time when I only had a guitar with stock passive pickups (I’ll tell you more about that guitar below). I had it in my head that I needed hotter pickups to record metal music.
So I kept telling myself something was missing from my Ibanez.
A few years later after accumulating more guitars, and ones with active pickups, I realized that the Ibanez with passive pickups gave me a distinct tone that I really liked. I still have that guitar today and use it in my studio often.
I actually recorded my 2nd album ‘Heavy Metal Workout’ with a guitar that has passive pickups.
Stock passive pickups are usually not a guitarist’s first choice for getting metal tones. But I used my Ibanez Prestige RG1570 with the V7, S1, and V8 stock pickups to record my album Heavy Metal Workout.
You can read more details on how recorded that album here: Behind the Scenes: Heavy Metal Workout
Amp Settings for Recording Metal for the Mix

This section is arguably where it counts the most. You can have all of the right gear and even the most expensive guitar, but if you don’t get this part right, your mix is going to suck.
The number one rule to remember when recording metal guitar is the tone you use for recordings is (or should be) different from your bedroom or practice tone.
I’m going to share my exact amp settings below. But first…
Your gain and EQ settings are going to determine whether or not you have a tone that’s going to sit well in the mix or if it’s going to make your mix sound muddy. Obviously, you don’t want the ladder.
The thing you have to remember, and this is tough for us guitarists, you have to account for the other instruments (and frequencies) involved.
It’s not just about your guitar. Hey, I told you this was going to be tough!
There are two mistakes many guitar players make when recording metal:
- Too much gain
- Too much low end
Why You Need to Use Less Gain
Yeah, I know, it’s metal and we want to crank the gain up to 11. But too much gain is a recipe for a muddy mix.
The more gain you have, the less clarity you’re going to have once you include that track in the full mix. And you probably won’t hear the muddiness when it’s just you playing and tracking. But once you (or your producer) sit down behind the console, you’ll more than likely notice that your guitar doesn’t sound as clear when combined with all of the other instruments.
This is especially crucial if you’re doing a lot of riffing. You want those notes to be pronounced and have clarity.
Solution for Gain: Try reducing the gain as low as you can go while still having that saturation and distortion you want. Between 6-7 is my personal sweet spot for gain.
Drop that Bass
Guitar players tend to want to boost the bass on their amp’s EQ as well. That’s fine for playing in your bedroom. But it’s not going to work well in the full mix if you’re recording a song or album.
You may need to cut your bass in order to leave room for the bass guitar and kick drum to produce those low-end frequencies.
If your guitar is producing them, then they’re going to clash and your mix is going to sound like crap. It’s going to be overkill (and I’m not talking about the band!) on the bottom end.
Solution: You don’t have to drastically reduce your bass but try cutting to about 4.5.
My Gain and EQ Settings with the EVH 5150 III (EL34) Amp
| Amp Component | Jason’s Typical Settings |
|---|---|
| Gain | 6.5 |
| Bass | 4.5 |
| Mid | 4 |
| Treble | 7 |
| Presence | 4 |
| Volume | 2* |
These settings are based on using my EVH 5150 III (EL34) 50-watt head.
It’s also important to note that these are my preferred settings. It doesn’t mean they’re the perfect settings for you. But I do believe this will at least give you a good starting point.
Volume: This really depends on where I’m recording and what amp I’m using. In the case of using my EVH in my small home studio (a 10×11 room), I get plenty of what I need with the volume being at around 2, which is surprisingly pretty loud.
If you’re in a larger studio, you’ll probably want to increase your volume. If so, you may even dial back the gain as you increase your volume so that you get more clarity.
Mic Placement for Recording Metal Guitars

The next step to getting a good metal tone for the mix is your mic placement. There’s really no right or wrong way to do this, but there are some strategies I’m going to share with you that will help you capture the type of tone you’re looking for.
In fact, I’m going to narrow this down to five mic placements for you to try. I’ll also list the type of tone this will give you.
These placements below are assuming you have the mic about a half-inch away from the grill except for the last mic placement, which is based on further proximity.
| Mic Placement | Tone Style |
|---|---|
| Directly in front of the cone | Bright and teney |
| Towards the outer edge of the speaker | Dark |
| Between the cone and edge of the speaker | Often deemed as the perfect balance |
| Treble | 7 |
| Presence | 4 |
Of course, there are countless placement options, but these are good to start with and you can ‘fine-tune’ your placement from there.
Here’s a video where you can here these different mic placements (the video starts where the music starts):
Best Mic for Recording Metal Guitars
As you can see in the video above and images, I’m using the good ole Shure SM57. It’s a timeless microphone, especially for recording high gain amps. This is because it’s a dynamic mic that can handle and articulate loud output sources.
There are many other mics you can use to record your amp with. But what I don’t want to happen is for you to go buy an expensive mic only to find that you’re not happy with it.
On that note (no pun intended…okay, okay, the pun was intended!), make sure you have the ability to try out different mics before buying one.
And don’t just go by what you hear on other YouTube videos.
Because there are always other unseen factors (like the amp, guitar, pickups, post-processing, and more importantly, the person playing). That said, the Shure SM57 is the perfect place to start, and for many like myself, the perfect place to end.
Recording Your Guitar Tracks

Here’s the moment you’ve been waiting for. It’s time to press that record button and see that track light up in your DAW!
In this section, I’m going to cover:
- Rhythm guitars (and my secret to extremely amazing-sounding rhythm tracks)
- Lead guitar track
- Using effects (do not skip this part!)
- Your performance
Method to Recording Metal Rhythm Guitars
You may already know this but if you don’t, I’m about to share one of the greatest recording techniques for rhythm guitars that are going to blow you away.
It’s actually simple. You’re going to record two rhythm guitar tracks and hard-pan each track.
Here’s the process:
- Record your first rhythm guitar track
- Hard-pan that track all the way to the left
- Create a new track and go ahead and hard-pan that track all the way to the right
- Record your 2nd rhythm guitar track
In a nutshell, or a turtle shell (because I like Ninja Turtles), that’s it. Pretty easy, right?
But that will make a world of difference in how your guitar tracks sound. It will also bring more life to the overall mix.
DO NOT just copy the first track you recorded to use for your 2nd track. That will not do anything for your mix. It will only increase the volume.
Record an actual 2nd guitar track.
That 2nd guitar is going to give you these awesome little nuances because it will not be exactly like your first track. And that’s what will bring life to your mix in an era where almost everything sounds over-processed and robotic.
Recording Your Lead Guitar Track
It’s usually best to record your lead guitar track and leave it up the middle, or you can pan it slightly one way or another. This is actually cool to do if you’re breaking up your solo and recording it in different pieces.
Here’s an example:
- Let’s say you have a 20-second guitar solo.
- When you go to record it, you split it up into 5-second segments.
- For segments 1 and 3, pan the track about 25% to the left
- On a separate track, record segments 2 and 4, and pan that track about 25% to the right
Or you may have lead parts where you want the guitars to harmonize. Just use the same method I described for rhythm guitars (hard-panning those tracks).
This sounds freaking amazing and it’s so much better than using a pitch shifter or any non-organic effect. You get a real-life harmony.
Back to the basics, if it’s just one guitar solo you’re reroding for that part, you may find it’s best to just leave that track up the middle with no panning.
Gain and EQ for guitar solos: Going back to the amp settings, I do like to boost the gain and the bass a little (not a substantial boost). Guitar solos naturally have more highs and you don’t run the same risk of having a muddy sound with more gain as you do with rhythms.
Secondly, you may also want to move the mic a bit closer to the cone (if your rhythm tracks were recorded with the mic further from the cone).
This helps it cut through the mix and also gives your guitar solos that differentiation from the rhythm that’s needed.
I use the same philosophy for any additional tracks like clean or ambient guitars.
Using Effects with Your Amp
I’m not going to say use or do not use effects (pedals, rack mount effects, etc.) when you’re recording. What I will advise is for you to be aware that once you record that sound, there’s no turning back.
If you don’t like how it sounds later then you’ll have to go back and re-record that track or that part. And if it’s one of those moments where you captured this amazing solo and you’re not sure if you can pull off again, well, that would not be cool at all.
Here’s a solution…
Record your amp with no effects (other than your noise gate) and just use your DAWs plugins for effects. For example, you can add a delay plugin to your lead guitar tracks or add a touch of reverb to your rhythm tracks. And if you can continuously modify those settings until you like what you hear.
Again, this doesn’t mean that you shouldn’t use hardware effects. Me, I like the way my Boss DD7 Digital Delay pedal sounds better than all of the delay plugins I’ve tried, so I record my lead tracks with that pedal on.
However, when I want effects with more depth, like those spacy reverbs or deeper delays and choruses for, let’s say, ambient parts, I use plugins for that.
Your Performance in the Studio
This goes without saying, but your performance is going to be the most important aspect of recording your guitar tracks.
Here are some basic yet noteworthy tips to use on studio day:
- Make sure you know your songs like the back of your hand before you attempt to record them.
- Hydrate yourself and make sure you have a nutritious meal before you start recording (you don’t want to be distracted by hunger, or anything else, for that matter).
- This should go without saying, but don’t get hammered (drunk) or come into the studio high or on anything that’s going to limit your ability to focus. Yeah, yeah, I know people say they’re more creative in that state, but when you’re in the studio, it’s time for business. Your creative time has already happened; you should know the songs and know your parts.
- It may sound a bit contradicting, but also give yourself a little room for that ‘in the moment’ inspiration to happen (this is typical during the guitar solo where you may feel something a bit different from what you originally wrote). Being in the studio can bring on that type of magic.
In short, be prepared. Studio time is money. And if you’re recording for your band, you also need to be conscious of their time.
If it’s just you recording your own album in your own studio (like many of us), then treat it like a job. Schedule the studio time and give yourself deadlines.
Have fun with it, but remember that your music is part of your legacy so don’t treat it lightly.
Post Production and Processing for Guitars

Now it’s time to put the finishing touches on your guitar tracks that you recorded. This is called post-production, or post-processing.
Since I’m just covering guitars in this post, I’m not going to go into mixing the entire song. But I do want to cover some important post-processing steps for your guitar tracks, especially if you’re recording in your home studio and you’re handling the mixing.
The good news is because you worked so hard to do everything right up to this point (by reading this post!), there’s not going to be anything outrageous needed.
In fact, there are really only two studio plugins that you’ll need. Even better news, your current DAW already includes these plugins so you don’t have to buy anything additional. They are…
- Compressor plugin
- EQ plugin
Using a Compressor Plugin for Metal Guitar Tracks
The job of a compressor is to even-out your track. This means bringing up those lower points and lowering the high points. The compressor should be first in your chain on those tracks.
So using a compressor plugin will help smooth out your recorded tracks. Most of the time this is needed for metal guitars because there’s a lot of aggressive playing, palm muting, alternate picking, and riffing…all of which will have a lot of high and low points.
This doesn’t have to be complicated at all. In fact, your DAW more than likely have a preset in its compressor for rock or metal guitar (or guitar, in general). You’ll probably be okay just using that.
But I’m also going to give you my own settings. As with everything in this post, this is just s starting point for you. Feel free to modify these settings to your liking.
- Threshold: -8.04 dB
- Ratio: 2.4:1
- Attack: .50 ms
- Release: 50.0 ms
Using an EQ Plugin for Metal Guitar Tracks
You may or may not need an EQ plugin for your tracks. But I’m going to say it’s probably best to throw one on there just to roll-off the bottom end.
The problem with metal rhythm guitars is even with the low cut you did on the amp when you recorded the track, you still may find that there are some low frequencies from your guitar track that are competing with the bass guitar, kick drum, and any other instruments.
You may also want to make some subtle adjustments to other frequencies. For example, some also roll-off the high frequencies on their guitar tracks.
Of course, you can play around with some of the other frequencies to fine-tune your guitar tracks. Just don’t go crazy with it because you don’t want to lose that initial tone from your amp that you worked so hard to get.
Video Tutorial for Recording and Mixing Metal Guitars
You can also watch the video version of this post below. It takes you through each level we discussed and you’ll also get to hear the tones as you go through it.
For this video, I’m using the ESP E-II Horizon FR-7 guitar with my EVH 5150 III (EL34) amp. All of the other gear (hardware, software, and equipment) is the same as what you read in this post.
Getting an Awesome Tone for the Mix
At the end of the day (or night), it’s all about the final mix of your song or album. You can have a guitar tone that sounds amazing in the room but that doesn’t always translate into a tone that sits well in the final mix.
That’s why I created this guide to give you the details that will hopefully save you from wasting time in the studio. There’s nothing worse than recording all of your guitar tracks only to find that they sound crappy in the mix.
And you only do so much post-processing. In other words, you can’t polish a turd. So it’s best to dial in the best tone possible from the start.
I really hope this guide helps you and encourages you to record your tone, and with using a real amp. There’s just nothing like.
Also, feel free to share this post.
Keep it Metal,
Jason